

I researched all aspects of RV life, from purchasing a rig to adventures on the road for the three years before embarking on my journey. Additionally, I made many purchases based on recommendations from RVers whose blogs and vlogs I trusted and enjoyed. In my mind, by purchasing things ahead of time, it would be one less thing to be worried about. One less thing to do once the rig was in my hot little hands. I thought of my stash for the newbie RVer—probably $1,500 to $2,000 worth of items—as RV Must-Haves.
On the surface, it is sound thinking. But in reality, not so much. Yep, this post is another one where I learned a lesson the hard way and, by writing about it, I hope to help others not make the same newbie mistakes while shopping RV must-haves.
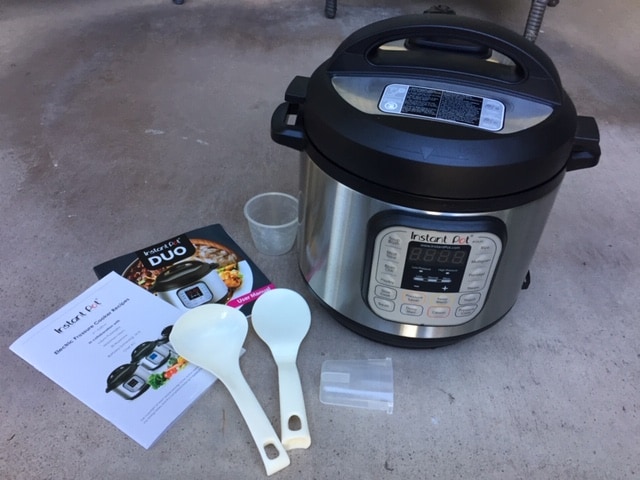
In my 2020 list of firsts, I shared that I purchased my Instant Pot before embarking on the road. Yes, the Instant Pot was one of my RV must-haves which speaks to how little understanding I had back then. Then, it turned out, I used it for the first time only recently. Now the fact it took me three years to use it has nothing to do with this post. However, one of my on-going struggles has been where to store the thing. It’s been in the RV’s closet on the floor, in the RV’s bathroom, in a bin stored on one of the beds as well as in the van, first in a milk crate in the back and then in a shopping bag in the passenger’s footwell.
Lesson Learned
I’m glad I purchased the Instant Pot. But had I waited, I might have chosen the smaller version and had more success with finding a good place to store the thing. So, my first bit of advice, which I’d mentioned before in a post on common newbie mistakes and how to avoid them is do not to make non-essential purchases too soon.
So, what, then, are the essential purchases? Here’s the list of what I consider must-haves before you pick up your new RV.
RV Must-Haves: Hoses and Their Accessories

You’ll want to be sure you have both a water hose and a sewer hose when you go to pick up your RV. Most rigs have a sewer hose attached to the rig. If that’s the case for your rig, you’ll want to determine if it will be long enough for the variety of camping situations. Most of us purchase an extra length of hose to have on hand.
Additionally, it is essential you purchase a water pressure regulator to attach to the hose. If you doubt the essentialness of this, read how I learned the lesson the hard (and costly) way. Additionally, a filter hose washer (a tiny screen inside a rubber washer) will keep dirt, bugs and other ick from making its way into your RV.
The essential accessory for the sewer hose is something to control the angle so the hose doesn’t experience any dips where sewage can pool, called a sewer hose support. This assumes that the sewer hose you purchase or that came with the rig includes the attachment to hook the sewer hose to the sewer drain at the campground, such as an elbow joint.
And while not absolutely essential, you may want to consider a water filter because the quality of water you’ll encounter as you travel varies dramatically.
RV Must-Haves: Leveling at a Campsite
As a newbie, you may not fully understand the importance of a level rig. First, there is simply the comfort factor. It’s amazing how uncomfortable you find yourself in a rig that tilts either front to back or side to side. But even if you think you can tolerate the odd sleeping arrangement, let me tell that comfort is a distance second to the main reason you want a level rig.
An unlevel rig can damage your RV’s refrigerator. It can be a costly and time-consuming error. I don’t fully understand the mechanics of it, but RV refrigerators do not operate the same way that refrigerators in a sticks-and-bricks do. However, a short article I found explained it this way:
RV refrigerators use gravity, rather than a compressor, to create the heat that ultimately makes the inside of the refrigerator cool. When the refrigerator is tilted for an extended period of time, the gravity-fed chemicals inside the unit may stop circulating.
Three degrees is the figure I’ve seen in a couple places as the absolute maximum percentage of non-levelness your rig should be. But I figure, why chance it? I always try to make my rig as level as possible which I wrote about setting up at a campground which included brief information about leveling. I also wrote an article about maintain your RV’s electric jack which included more extensive information about tips and tricks for leveling your RV.
After all the explanation, what is the newbie RVer must-haves when it comes to leveling the RV?
Accessories to Level the RV
You have several types of leveling options. Pick whichever appeals to you and would be best for your rig.
You need chocks and blocks. Most often these are purchased as a set called a RV leveling kit. It includes the curvy chock that you drive on to lift one side of the RV. Then the triangle blocks are used to make sure the rig doesn’t roll back off of them.
Some RVers purchase the flat blocks (the ones that remind me of Legos because they stack and interlock). Then they build a little ramp to drive one side of the RV onto. They come in kits or just a set of blocks.

In addition to the chocks and blocks you purchase to level, you’ll also need addition flat blocks or pads (pieces of wood work too) to put on the ground under your jacks. Don’t lower your jacks directly on the ground. You need support under the base.
If you have a leveling kit, this next item is not essential. But I have seen them with such regularity, I feel it needs mentioning. There are metal X-chocks (that look like they could be used as a torture device) that RVers use as an additional wheel stabilizer. These can also be when you have a level site but want to ensure the rig doesn’t shift or give at all. There is a big range in price points on these. Since I don’t use them, I cannot make a recommendation or definitely say that the more expensive ones are a better device for the job. Read reviews.
That said, I found some X-chocks include a lock so in addition to wheel stabilization, they offer security from theft.
Finally, you’ll need a tool to measure your levelness. I use a simple carpenter’s level. I measure inside the rig. Some people prefer to do it outside the rig. This may not be an essential purchase depending on your rig because some offer self-leveling features. And some will have a level built in. In fact, mine has a level built into the electric jacks. The front jack has a bubble level. But I prefer to hand measure it with a level. The good news on this item is that most of us already own one for simple home repairs and hanging things straight so it’s not likely something you’ll have to purchase.

Tips and Tricks for Purchasing Leveling Blocks
- I’ve seen photos of broken and cracked blocks. Check to see if there is a poundage limit and that the weight of your rig is compatible with the blocks before making your purchase. It might be worth checking out it they comes with a warranty.
- Make sure you buy enough for all the tires on one side of your RV. Vans, Class A and C Motorhomes and longer trailers will have two tires on each side of the RV so a single chock will not be enough.
- Don’t forget you need to level both front to back and side to side. It can be easy to focus on one and forget the other.
RV Must-Haves: Power Cords
It’s hard to image that an RV wouldn’t include the cord you need to hook up to shore power. But, first and foremost, confirm this with the seller.

You will discover that most campgrounds offer both 30-amp and 50-amp power. It’s a mix as to how campgrounds offer this. Some will have a section of power posts with 30-amp and a different section with 50-amp. Obviously, they’ll assign you a space based on which type of power you need. Some campgrounds have power posts with both so any camper can park in any spot. Then you use the outlet that matches your rig.
That said, I have been to a couple of campgrounds that only offer 50-amp power posts. That means a converter is essential if, like me, your rig is 30 amp.
While someone might make the case that a converter isn’t essential right out of the gate, I’d beg to differ. Eventually, it’s a good idea to have a variety of power converters so you are prepared for every situation. I wrote about why in this article.
But out of the gate, I’d recommend ensuring you can hook up to a power post regardless of whether it is a 30 amp or 50 amp. That means, if you have a 50-amp RV, you’ll want to bring a 30-amp converter. Likewise, if you have a 30-amp RV, you’ll want to purchase a 50-amp converter. In both cases, you are going male to female.
When it comes to power, the other essential is a surge protector. Don’t go cheap here. A good one can be pricey and, after you’ve just put out so much money for the rig itself, it can be easy to dismiss this or hold off until later. But, consider this: one strong power surge can take down your entire electrical system resulting in a fix that costs much more than the surge protector.

Must-Have Tools & Miscellaneous
I’m not going to list any specific tools here because with so many rigs, there’s just no way to know what tools fit with your rig. Suffice it to say, you’ll want a well-stocked tool box with both US and metric sizes. Think in terms of the RV inside and out. Also think about what might be needed for your tow vehicle or the toad.
If your RV doesn’t come with a fire extinguisher, pick up a one or two or three of those depending on the size of your new rig.
Finally, if you are heading to your first RV adventures from picking up the new RV, be sure you bring a first aid kit. You can purchase a pre-packaged one or put together one yourself (link is to article I wrote on the one I put together).

If your rig has a black tank, you’ll want to bring disposable gloves. Actually, they aren’t bad to have on hand anyway for both nasty and messy jobs. But, with a black tank, they definitely make the RV must-haves list.
If you have a composting toilet, you’ll need to bring your composting material. I have a five-part post all about the composting toilet, from what one is and how it works to getting rid of a bug infestation (and here is the post about preparing the composting material). You can use either sphagnum peat moss or coconut coir. I’ve only ever used organic coconut coir and nearly all RVers I know do the same.
Overall Tip Before Purchasing Any RV Must-Haves
It’s important to communicate with your purchaser, whether that’s a manufacturer, dealer or private seller, to find out what is included with the purchase. You’d hate to pick up the RV only to discover you didn’t have a basic—but RV must-have—item. Likewise, you’d hate to pick up the RV to discovered items you spent money on an item that were included with the purchase.
If you have any must-have items that a newbie RV should purchase before picking up their RV, please share your ideas. After picking up your rig, you can figure out what other items you need to enjoy the experience such as kitchen and outdoor items. I hope this list gives you something to think about and a place to start. Happy travels.
Links to Relevant Posts:
- List of Firsts: 2020 Edition
- More Newbie RVer Mistakes and How to Avoid Them
- How to Install a Water Pressure Regulator
- Step-by-Step Guide to Unhitching a Travel Trailer
- Jacks Maintenance for Your RV
- Holiday Gift Guide: Stocking Stuffer Ideas for the RVer
- First-Aid Kit for the RVer
- What It Is and How Does It Work?
- Getting and Ridding a Bug Infestation in the Composting Toilet
- Preparing and Emptying the Compost Toilet
To see products recently purchased by readers or to browse and shop at Amazon, follow either of these links. Huge thanks for your support.
- Dot&Dot Bendable Memory Foam Travel Pillow
- Teach Yourself VISUALLY iPhone 12, 12 Pro, and 12 Pro Max
- Rand McNally 2021 Road Atlas & National Park Guide
- Breville Smart Oven Pro Convection Countertop Oven
Affiliate Link Disclosure. As a result of being an Amazon Affiliate, I earn from qualifying purchases.


Additionally in the hose category, you should have a second hose designated for non drinking water uses. The fresh water should be kept only for that use, but another hose is needed to rinse the black tank. I’ve encountered increasing numbers of dump stations recently that no longer keep a hose connected there- and they were often leaking, or broken in some other way. And a water splitter attachment.
You are so right, Ruth. I use a water splitter and then refill jugs of water from that for drinking and cooking. Plus, since I don’t have a black tank, I sometime forget that it’s advisable to have a second hose. Good addition to the list. Thank you.