
It seems like it’s been a while since I did an RV maintenance post so I wanted to share a recent RV project. Replacing my RV’s window seals has been on my “to do” list for some time now. It was so simple and easy and quick, I’m almost embarrassed to admit that my good intentions started a year ago when I bought the supplies. I am able to write this post now because the project finally got checked off the “to do” list.
Before we get started, I need to clarify a couple things. First, and as always, my only reference point is on my Oliver. Your RV might have a completely different set up which makes the process for replacing the window seals quite different. Second, when I use the term window seals I’m not talking about the squishy rubber part along the edge that’s used when the windows are installed. Those are also called seals, I learned, which makes this all a little confusing. Other words I found for what I’m talking about are weather stripping or a window gasket.
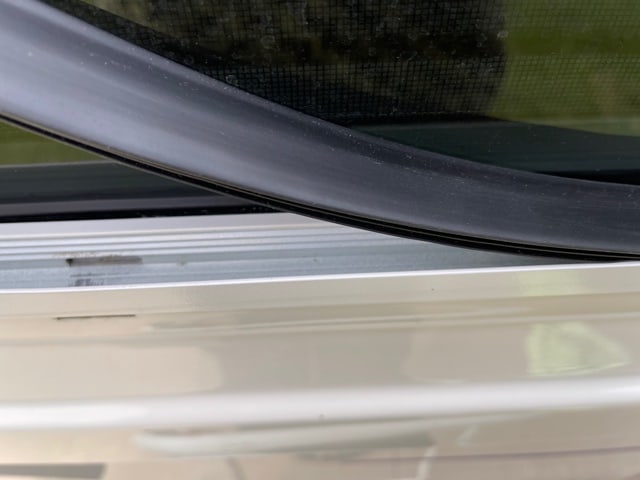
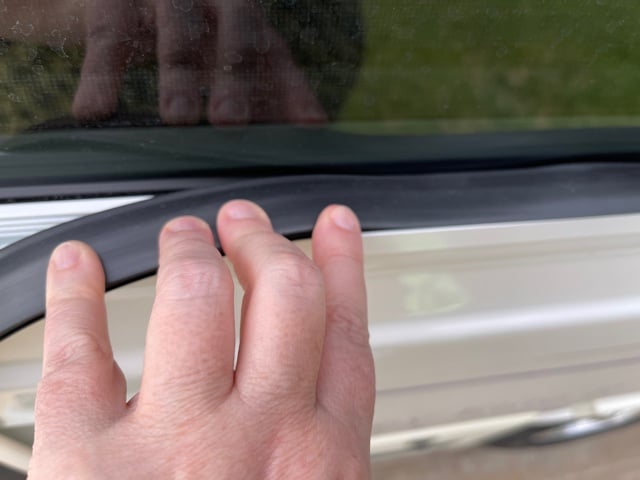
You know how many windows are divided in half? One side is solid and the other side allows you to open it to the screen for air flow. That side with the screen, on my trailer, is set in track about an inch from the outside wall of the trailer. An Oliver has a double hull providing a few inches between the outside and inside walls of the trailer. The vinyl window seal then runs around the flat space created between the window and the outside wall of the trailer as a barrier from water getting in. The window isn’t open but you can see this in the feature image.
That vinyl window seal is what I replaced and what this post is about.
Why Replace Your Window Seals?
Two reasons for replacing window seals comes to mind. Like so many things getting baked in the sun, they can break down and not do the job as well as you want them to. It’s a good idea to inspect them regularly watching for signs that it’s time to replace them.
The second reason–and the reason most Oliver owners replace theirs–is that the white window seals start looking grungy and cleaning them (even with bleach water) doesn’t restore them to white. The ugly dirty look of the seals doesn’t match the ultra white of the fiberglass.


So, replacing the seal is more about the aesthetic than an absolutely necessity. Regardless the reason, the how-to is the same.
Overview of the Task
The job of replacing these RV window seals is incredibly easy. But it is yet another task on the never-ending task list when you own an RV. In other words, why do it more than necessary? In other words, what good would it do to replace a white seal with another white seal only to have it stain and get ugly all over again in a short period of time? The answer? It would do no good.
So, taking the cue from other Oliver owners, I replaced my white RV window seals with black ones. With the super white shiny Oliver, you might be thinking that anything other than white is going to look terrible. Luckily, since the window seals are along the windows, which are tinted dark, the black blends in and doesn’t call attention to itself like you might imagine.
The job itself is three simple steps: 1) remove old seals, 2) cut new seals to fit, and 3) seat the new seals.
But, let me expand and give you visuals to make it easier. Additionally, it wouldn’t be a how-to post without a few added, tips and tricks.
Supplies You’ll Need

At the absolute bare minimum you will need:
- Measuring tape
- New vinyl seal (more on that in a minute)
- Box cutter or razor blade
- A board (not pictured) or something similar
First, make sure your measuring tape is long enough to go the full length of the window seal. Second, a board makes it easier to get a good cut through the vinyl. You might also want a straight edge if your cuts tend to go sideways. Third, the replacement seal, obviously, is going to be different for every RV. Check your manual or RV-specific forums to find what you’ll need.
If you are an Oliver owner (at least for the 2017 model, like mine), you’ll find what you need at Pendland Industries. The product you need is called 1/2″ Glass Vinyl Seal, Model Number H109-376. As I write this, the price is $5.17 per foot. The product is available in white or black. I ordered 17 feet. I chose not to replace the small bathroom window’s seals so ended up with enough left over to do one more regular window.
Additional supplies that you might find useful:
- Step ladder, depending on how high your windows are or how short you are.
- Cleaning supplies to wash the window frames and windows, including a bucket, cleaner, cleaning clothes and variety of brushes for the dirty small crevasses.
Replacing Your Window Seals Step-by-Step

Step 1: Lay out the new window seal material to help it flatten which makes measuring, cutting and installing the seal easier. On a warm day, it flattens pretty quickly.

Step 2: Remove old window seal material. Because it is tucked into the frame and not installed with any type of adhesive, the process is quick and easy.
Step 3: Clean the window frame. This step probably takes the longest because of the small crevasses you have to pay attention to. If your rig has weep holes, you’ll want to clean those as well.


Step 4: Either by measuring with a measuring tape or by using the old window seal, figure out the length of the new window seal you’ll need. It’s better to cut it a little long and trim it than to cut it too short. Put the board under the vinyl seal and make a straight clean cut.
Step 5: Place the new window seal in the cleaned track of the window. Make sure to start at one end and butt it tight to the starting point. Go all the way around the window.
Step 6: Push the window seal material into the track. Go along it with your fingers several times pushing it in. Trim off any excess for a good tight fit.

Step 7: Step back and admire your handiwork. And, while you are there, you might as well wash the windows.
Tips and Tricks
- Be sure to buy extra seal. You’ll want enough to confidently cut an extra inch or two in length for each window, then to trim as necessary. You may even decide to buy enough extra for one additional window…just in case.
- So, I’m going to advise you to do one thing different than what I described above. Above, are the steps I took to replace my window seals. Frustratingly, even though my seals were tight when I installed them, a couple weeks later I had a little gap (much like the gap you see in Step 4). Next time, I think I will wait a week or two before I do that last trim. It’ll give time for the seal to settled into the frame and to shrink a bit. That said, if you have this happen, move the seal around so that the gap is up on top because gravity will mean less water getting in at the top than if you leave the gap at the bottom.
Links to Other How-To Posts
- Hack: Adding Mud Flaps to the RV’s Tow Vehicle
- Jacks Maintenance for Your RV
- How to Install a Water Pressure Regulator
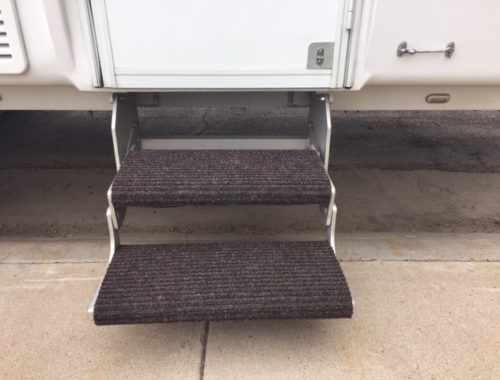
- Hack: Adding Carpet to Your RV Steps
To see products recently purchased by readers or to browse and shop at Amazon, follow either of these links. Huge thanks for your support.
- Danco, Black, Rubber Washing Machine/Garden Hose Washer, 5/8-Inch
- Earthbath Oatmeal & Aloe Pet Shampoo, Vanilla & Almond, 16oz
- Earthbath Oatmeal & Aloe Pet Conditioner, Vanilla & Almond, 16oz
- Vgo 10-Pairs Reusable Household Gloves
- ECCOSOPHY Microfiber Beach Towel – Quick Dry Pool Towels
Affiliate Link Disclosure. As a result of being an Amazon Affiliate, I earn from qualifying purchases.


The Steps to Installing a Frameless RV Window: First, remove the RV window. Look at your RV window and check the location of the screws that secure it to the RV wall. Ensure you use the correct screwdriver to loosen and remove the fasteners from their slots. The window seal should also come off when removing the old RV window, you might have to scrape the rubber seal from the perimeter. Verify the fit of the frameless window into the hole before installing it. Ensure the exterior window flange does not overlap while providing an exceptional seal to the RV’s sidewall. Prepare the frameless window, then install it. Ensure the trim’s correct alignment before fastening the corner screws.
Hey Dalton, Thank you for adding this to the conversation. Since I’ve only had one RV, my reference point is often limited. I appreciate you taking the time to share this info.
Not allowing your RV battery to discharge below 50% can help extend its lifespan. So do check for parasitic loads, observe the correct battery charging process, and manage the battery’s fluid levels.
Great info, thanks for the details! It is advisable to check the rubber gasket around your RV windows. Be sure to always be on the lookout for any rubber that appears to disrupt gasket continuity.
Good advice. Thanks Dalton. I have an article about helping preserve gaskets using Captain Tolley’s Creeping Crack Cure but I used it for the gaskets around my outside lights. Thanks for the comment and the reminder to always pay attention to cracking and degrading rubber.