
Like so many things in RV life, I stumbled into the fact that electric RV jacks need to be maintained. The’re so simple—press a button they go up, they go down—that I never gave them much consideration. It never occurred to me there might be one or two things I could do along the way to keep them in good working order. Now I know different and want to share what I’ve learned.
The jacks system on my Oliver is electric and what I’ve learned focuses on electric jacks. But some of what I’ve learned applies to all types of jacks so whether you have an electric, hydraulic or manual jack, I think you’ll find something of value. If you have additional tips, please add them to the comments.
Definitions
An electric jack means that the raising and lowing of the RV jacks is done by pushing a button. It’s done without much physical effort on your part. The electricity needed for this task is pulled from your RV’s battery.
A hydraulic jack raises and lowers the rig too. They use hydraulics, pressure created by forcing liquid (such as water or oil) through a tube. I’m not sure if it uses electricity but I’m guessing it does.
A manual jack is one where you physically use a crank to raise and lower the RV jack. Crafty people create a setup where a power drill aids them in spinning the crank. It’s similar to the jack used to raise your car when changing a flat tire.
The tongue jack is found on trailers, not on motorized rigs (Class A, B or C). The tongue is the front part of the trailer including the hitch. A tongue jack will come with information about how much weight it can hold and how far it can lift the trailer. In the case of my Oliver, the tongue jack can raise 18 inches and lift 3,000 pounds.
Stabilizing RV jacks, as you might guess, stabilize the rig. When they are not down you feel a lot more rocking and rolling getting in and out of the rig, as well as when you move around inside the rig. They are not meant to lift the rig, say for maintenance or to change a tire.
The ram is defined as “any of various guided pieces for exerting pressure or for driving or forcing something by impact.” I learned this term recently, previously calling it the “silver post thing.” On electric and hydraulic RV jacks, the ram is the post that comes down to support the rig.
Leveling
I read my own jacks manual in preparation for this post. The one instruction that stood out to me was that jacks should not be used for leveling. I don’t think I’d heard that before.
When I get to a new location, I get as level as possible before doing anything with the RV jacks. That means looking at the terrain and pulling the trailer to the most level spot in the site. Though I balance that with making sure I’m close enough to the hookups (power, sewer, water). Next, if needed, I pull out the leveling blocks for further side-to-side leveling. With a Class A, B or C, leveling blocks also work for front-to-back leveling.

After the rig is as level as possible and after unhooking, I use the RV jacks to finish the job and to stabilize the rig. Some rigs come with a leveler. Mine did. But I don’t like it and don’t find it accurate. (However, I recently learned that it most likely only needs calibrated because it wasn’t done at Oliver before I picked up the trailer. It’s easy to do but now I’m so used to my own process that I haven’t bothered.)
Many people attach a small t-level to their rig. I may do that because I like the compactness of that solution but, for now, I left sticks-and-bricks with a 12-inch leveler in my tool box. And it works fine. I store it in the rig’s closet and set it on the dining room table during set up. Setting it on the tongue also works.
After a few days or a couple weeks, it may be necessary to tweak the level of your RV jacks. Recently I parked in desert sand. I got the trailer level on the first day but the level blocks sunk into the sand on one side of the rig. I used the jack to raise that side of the trailer an inch (or less) to even out again.
And, one final note: even if you can put up with a rig that’s not level, you shouldn’t. In addition to comfort, a level rig is an important part of RV refrigerator maintenance. I don’t know the mechanics but a refrigerator not kept mostly level will soon become a damaged or broken refrigerator. Refrigerators are pricey to replace (just like in a house), so don’t chance it.
And one more final final note: you always want to have the base of your ram on something–a leveling block, a piece of wood or a heavy-duty pad. You don’t want the ram directly on the ground. It will sink in soft ground and can damage a paved surface.
May or May Not Be True

I talked to another Oliver owner who told me that someone told her that when it comes to RV jacks everyone should follow the four inch rule. It means, put enough blocks under the jack that you lower the RV jack no more than four inches. I only heard this from one person so it may or may not be true.
I get the logic. Think about the physics. You have more stability when you are being held up by, say, a square foot block than a three inch diameter tube. Plus, you disperse the weight over more area.
The two most common blocks I see are wood (either 4×4 blocks or 2×4 planks) or the Lego-like leveling blocks. Or a combination of both. What’s nice about the Lego-like ones is they fit together, giving a snug even fit.
I use the Lego-like ones for the two stabilizer jacks at the back of my trailer. Then two 4×4 blocks covered by heavy-duty hard rubber pad for the tongue jack.
Cleaning and Lubricating RV Jacks
When the ram has been exposed the elements while stabilizing your rig, it gets dirty. You don’t want all the dirt, sand, leaves, grass and other random bits retracting back into the jack stand. So, it’s important to both clean and lubricate the ram every time you use it. (I didn’t know this for the first year on the road so mine only recently started getting this treatment.)
No doubt there are many cleaning and lubricating options out there. Find the one you like best. What I use is WD-40 and WD-40 Dry Lubricant.

When I’m getting ready to leave, first I go to each ram, spray it with WD-40 and wipe clean with a microfiber soft cloth. I do both the ram and the base though you don’t have to do the base because it doesn’t go up in the stand. The next time around the rig, I spray WD-40 Dry Lubricant on each ram. Then I start the process of retracting the RV jacks.
Using the dry lubricant (as opposed to another spray of the original WD-40) prevents gunk build-up of a wet product. Plus there will be a few minutes between spraying and raising each jack. If you are hitching on a windy day, it’s plenty of time for particles to attach to a moist ram.
One of the reasons I like WD-40 is because it is a multiple-use item. When space is tight, a multiple-use item takes up a lot less space than many single-use items. On their website they call the blue and yellow original multi-use can, the one we are all familiar with, “the can with thousands of uses.” Plus, an added bonus is you never have trouble finding WD-40.
In preparation for writing this post, I looked at many RVs and their jack set up. One thing I noticed is that most Class A rams are a bit under the rig. So, having a towel nearby will come in handy as you will likely lie on the ground to reach the ram. Or at least have to get on your hands and knees to reach the ram. I use my yoga mat for sitting-on-the-ground hacks.
Maintaining the Stand on RV Jacks
I learned the word ram, but I’m not sure what the stand is called that the ram retracts into. Tube thing? Or, maybe casing?

Regardless, that stand does well with a little TLC too. The tube part of mine is metal while the top with the control button is plastic.
Plastic can crack with too much sun exposure. Not to mention, sun can fade the color. The good news is that the solution is super simple. Just keep the plastic away from direct sun exposure.
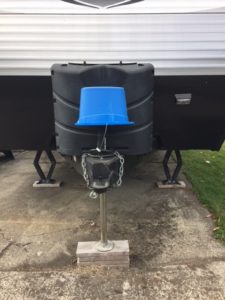
Creative jack cover or he was drying the bucket. Not sure which.
I knew I didn’t want to mess with a snug-fitting cover. So I purchased a loose bag-like cover, called a universal trailer RV electric tongue protective cover which included draw strings to pull it tight. So far, I haven’t once used the draw string. It’s long enough that big winds haven’t blown it off. And I’ve been in some really big winds. And rain slides right off.
Please note, I do not keep the cover in place on travel days. I store it in my van. Then, once I’m level and all set up at a new location, I put the bag over the stand and don’t think about it again until I’m getting ready to leave.
At the RV park in Portland, I saw a creative solution. A bucket. As I said, I love multi-use items in small spaces. He probably uses the bucket for cleaning and other projects. Also note in the photo, he used wood planks as blocks and that both the front and back jacks are manual.
Final Important Notes on RV Jacks
- Retract your jacks all the way or risk damage. Do a double and triple check on this. I’ve heard horror stories about RVers pulling forward before the jacks were retracted. Generally, that can be an expensive lesson and one you don’t want to have to learn the hard way.
- Read your manual.
- My electric jacks are also manually retractable. So, if I ever got into a situation where the electric part stopped working, I can still get them up. I suspect (though don’t know for sure) that this is true for all non-manual jacks. Be sure you know how to do this and that you have the proper tool (my trailer came with the crank I’d need) to do it. Hopefully you’ll never need it but knowing you are prepared brings peace of mind.
If you have experience with jacks or any tips for maintaining either manual, hydraulic or electric jacks, please share.
Other Useful Hack Posts
To see products recently purchased by readers or to browse and shop at Amazon, follow either of these links. As an Amazon Affiliate, I earn from qualifying purchases. Huge thanks for your support.
- OUIDAD Moisture Lock Leave-in Conditioner
- Miracle Foot Repair Cream 60% Aloe Vera
- Camco Flying Insect Screen
- InterDesign iDry Microfiber Shower and Bath Mat
Affiliate Link Disclosure. As a result of being an Amazon Affiliate, I earn from qualifying purchases.


Debbie you did a very thorough job explaining the care and maintenance of the jacks and all that goes into leveling and setting up our Olivers!!!! I didn’t know about the WD-40 Dry Lubricant!! Good job, thanks!!!
Glad you found it useful. Two people in the Oliver Facebook group went out and cleaned and lubricated their rams today. I love that I can be a resource to fellow travelers.
From not knowing how to change a tire on your way to RV life to now, you have learned so very, very much. And you taught yourself so well that you are now able to teach others. Enjoy your week. Love, Marie
Hey, Oh I don’t know if any one has told you but you Do not use WD40 on Leveling Jacks it damages them.
Silicon spray made for them and wipe them down first before taking them up and spray with silicon spray and wipe and then bring the jacks up. I do mine every time I have them down for a couple of days.
both companies told me what to use 3 and 1 Silicon Dry Lube it works and doesn’t hurt the jacks.
Thank you for the information. I’d never heard that WD40 is damaging. I’ll check out the brand you recommended. I appreciate you taking the time to comment and let me know.
I do agree with the fact that WD-40 is the best lubricant so far, and it needs to be the must have in a safety toolkit. I used to rent the camper for my vacations and I like being on the safer side I purchased my own jacks. But these leveling blocks are something new to my me. Can you please write some leads where to purchase them online?
Great article. Bought and installed on my vintage 1972 Prowler that has been converted into a toy hauler. This jack handled that heavy beast loaded to 13,000 lbs. Groaned, kept going. Still in use today.
Wow, that’s amazing. I love vintage trailers. They are so cute. Hope you are enjoying yours, Zoe.
I appreciated the way you explained that jack maintenance isn’t just about convenience—it really affects safety and long-term wear. Do you think RV owners sometimes underestimate how much damage can come from being even slightly off-level for extended periods?
Hi Anna, you are so right. It really can affect things long-term. Not sure if RV owners understand the importance of getting their rig as level as possible. Not only for the RV and its jacks, but also for the comfort of not having to sleep on a tilt.